I am happy to announce Xeno – Chord Explorer Version 1. I’ve spent a great deal of time looking through all the available chord plugins in VST, AU and M4L formats and just never really found what I was looking for. Most chord exploration programs either have non-generative fixed chord patterns per key (Cthulu) or chord generation that is based on the full 12 note scale and deals in semitones (Nordmann Chord Generator or Ableton Live MIDI chord plugin). There is nothing wrong if that’s how you like to work, and you can use a note quantizer after the chord generator. That said, I wanted a chord generator that generated all chords in key with varying chord sizes very easily. I do not come from a keyboard/piano background and I don’t like getting lost in theory while I write music. This is the perfect tool to really get into exploring chords in all sorts of ways. Even further, pairing it with Ableton Live’s arpeggiator and you REALLY have a lot of flexibility in what you can do. The best part, this plugin is free (provided you own Max For Live)!
Download “Xeno – Chord Explorer” Here
Interface Explanation:
This is definitely not the smallest interface in the world, that said, it was designed for speed and results. The last thing I wanted was to spend a bunch of time and effort to get to different settings, as you know, that kind of tedious work takes you out of the mindset (or the reason you are using this plugin in the first place!) Spend a few minutes going through the explanation of the interface (it’s easy) and I promise you that it will all make a lot more sense. Also note, I tried to keep as many controls adjustable by automation in Live so you can further push what you want to experiment with (or be generative).

The first four knobs are very straightforward. Key sets they key you are working in; C,D,E,F,G,A,B. Scale, as you imagine, sets exactly what it says. For now, Xeno is designed to support 7-note scales only, and includes: Major(Ionion) and Minor(Aeolian) which are the two most common used, along with; Dorian, Phrygian, Lydian, Mixolydian and Locrian. As you change the Key and Scale settings, this will be reflected in the S: readout near the bottom of the left side of the patch. In this example we are set to CMajor.
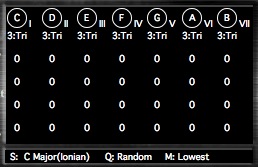
The Quantize setting sets what happens when you hit a note that is not in the current key/scale you have selected. You can see all the note of the scale but looking at the upper display area of the patch. For the 7 key positions you see listed C,D,E,F,G,A,B for the CMajor scale.
The quantization settings are Down, Up and Random. So, if you hit the C# key and you have Down selected, it will be quantized to C. If you have it set to Up, it will go to D instead. Random picks randomly between up and down. This can be fun when converting something from another key and you want a little more variety.
The Mode settings indicates what happens when you press multiple keys and/or how you let those keys go. The settings are; All Notes, Last Note, LIFO, Lowest, Highest and Random. All Notes means every note you hit will generate a chord all at the same time. For high note count chord settings, this is going to not be very desirable. However, for lower note chords, you can generate a lot of variability. Also, notes that are shared between chords will be held when one of the chords goes away. Last Note replaces any current playing chord with a new chord from the last thing you pressed. Only one chord is active at a time. When you let go of the last note you hit, even if you have other keys held down, they will not retrigger. However, LIFO, which is Last In First Out, works very similar to Last Note with the exception that when you release the last note, the previous last note will then trigger. Works very similar to a monophonic keyboard in Legato mode. Highest and Lowest look at all the held down notes and trigger the highest or lowest. This check happens every time a new key is pressed or released. Random picks a random note out of all held down notes.
Also in the LCD area is the settings for each chord. The plugin generates 7 different chords based on which note of the scale is being triggered. For each of these positions, you can customize the chord in many ways. Realize that EVERY C note you press is going to generate the same pattern that you have set, just at a different location on the note scale. Let’s look at one note and all the settings involved with it.
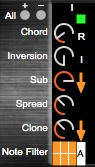
Each chord has 6 sets of parameters that can be changed. The green button you see indicates whether if you hit the RANDOM button, if that chord will receive any random settings. This allows you to not replace chords you want to keep, but replace others that you aren’t happy with. The All +/- buttons set ALL the random active buttons on and off for each note lane.
The Chord setting allows you to pick one of 16 different note settings; None, Root, Pwr, Tri, Sus2, Sus4, Add9, 6, 7, 7s4, 6/9, 9, 9s4,11,13,13s4. The None setting turns off the chord so nothing is generated. Root just plays the quantized note alone. Pwr plays the power chord (technically not really a chord) omitting the second note. All the rest are many of the common chord structures you would use for a scale. The rest are very straightforward.
Inversion is just as it says, it generates chord inversions. A setting of 0 is no inversion. As you increase the number, the highest inversion will be one less than the number of notes in the chord. So for the Tri chord, there are 3 notes. This means that an inversion of 1 or 2 will generate inversions. Given that inversion 3 would just generate the chord at the next octave up, we stop at 2 for any value of inversion higher than 2. Again, the more notes in the chord, the more inversions that you will have available.
The Sub setting generates an additional note of JUST the root note of the chord at either 0 (off), -1 or -2 octaves down. The arrow to the right indicates whether that sub octave root note is generated before or after the inversion.
The Spread setting is designed to spread a chord further apart across the keyboard by octaves. These are fixed octave amounts based on how many notes are in the chord. Spread occurs before Inversion, Sub or Clone. I refer to this chord before Sub or Clone notes are added as the “Original” chord of the chord pattern being generated. Here are the octave shifts per note position of the chord for the +1 setting. For +2, all octave shifts are doubled. For -1, -2, the octave directions are shifter lower in the note ranges. Note the ROOT note of the chord NEVER spreads out.
Spread Setting of +1:
2 Note Chord – +0 octave shift note 1, +1 octave shift note 2
3 Note Chord – +0 octave shift note 1, +1 octave shift note 2, +2 octave shift note 3
4 Note Chord – +0, +1, +1, +2
5 Note Chord – +0, +1, +1, +2, +2
6 Note Chord – +0, +1, +1, +2, +2, +3
The Clone setting copies the entire chord up and down by octaves; -2, -1, 0, 2, 1. The arrow works just as it does for the Sub setting and generates the clone before or after the Inversion is generated.
The last setting is the Note filter. The chord generation has the concept of “Original” and “Derived” notes. Original notes are those from the initial chord generation that have been spread or inverted. Derived notes are notes that get generated by the Sub or Clone setting. The reason this is important is the note filter can mute those different notes based on how the filter is set. Each of the six boxes represents a note position, starting from the top left. So the first row is note positions 1, 2 and 3, whereas the second row is 4, 5 and 6. When the box is orange, the note is active. The A on the right indicates ALL types of notes in each position will be muted. The settings for the note filter are None, Original, Derived and All. In the None setting the note filter is shut off. In Original, none of the derived notes will be filtered out. So, if you were playing a CMajor chord and had it set to clone +1 and you had the filter set to Original, the CMajor chord in the original position would be completely silenced, whereas the clone would not. If you changed the setting to Derived, then the cloned notes (and a sub if you had it set) would be silenced but the original would note. All silences both. Playing around with this it will be easy to see how it works. For instance, setting the Note filter to silence note position 2 while you have a Tri chord selected would be the same as a Pwr chord. I added this feature so if some chords get too busy but you want to just try selectively getting rid of some notes it wouldn’t be too difficult.
That’s it for the chord generation! As I said, it’s pretty easy, and extremely powerful.
The next section sets the Range that the chord explorer will be active. Notes outside this range will be passed right through. This allows for very complex generation where you want something to NOT generate chords maybe lower or higher in the scale.
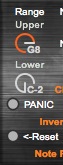
Panic sends Note Off message to every note position in case anything gets stuck on. Reset sets the chords back to a known standard with chords set to Tri and all options off and all keys on. This is in case you go down a rabbit hole you don’t like and want to escape out to something easy to start again from.
The Note In/Note Out section is there for you to see what is being generated.

The most important exploratory section is the random area. The purpose here was to make it so you had EXTREME control over what settings you want considered for Random. In addition, I have added a preset section to the random area outside of live so you can save some quick presets that you can switch between.

How it works is if the orange button is lit, when you press random, that is one of the possible choices. If all the orange is off (which second to last preset will give you) than nothing will be randomized. When you press the random button, anything with an orange button will be randomly selected and send out to each active random chord spot. If you have just one thing active, it will set it to that setting (since a random of 1 element will always be that element). Note that Sub and Clone have a BI (Before Inversion) and AI (After Inversion) setting. These will randomize those arrows on each of the lines.
Clicking on a random preset will load it. Shift click will overwrite a preset in a slot. Alt-Shift or Option-Click click (depending on your keyboard) will erase a preset. These presets are designed to give you quick known random settings you like that are easy to recall.
There you have it. If you start using this and enjoy it or write something interesting, be sure to add us on FaceBook and share your thoughts or creative content. Also, if you have suggestions or issues, let us know at the MaxForLive page where you download the plugin. I am already working on expanding the plugin for a future version adding a lot of additional fun capabilities!
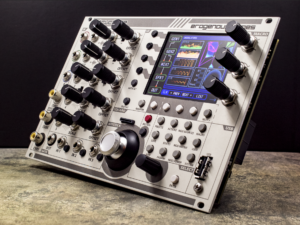 STRUCTURE is now shipping worldwide, available at all your favorite retailers. Check the DEALERS page to find out where erogenous tones modules are sold.
 VC8
VC8 LEVIT8
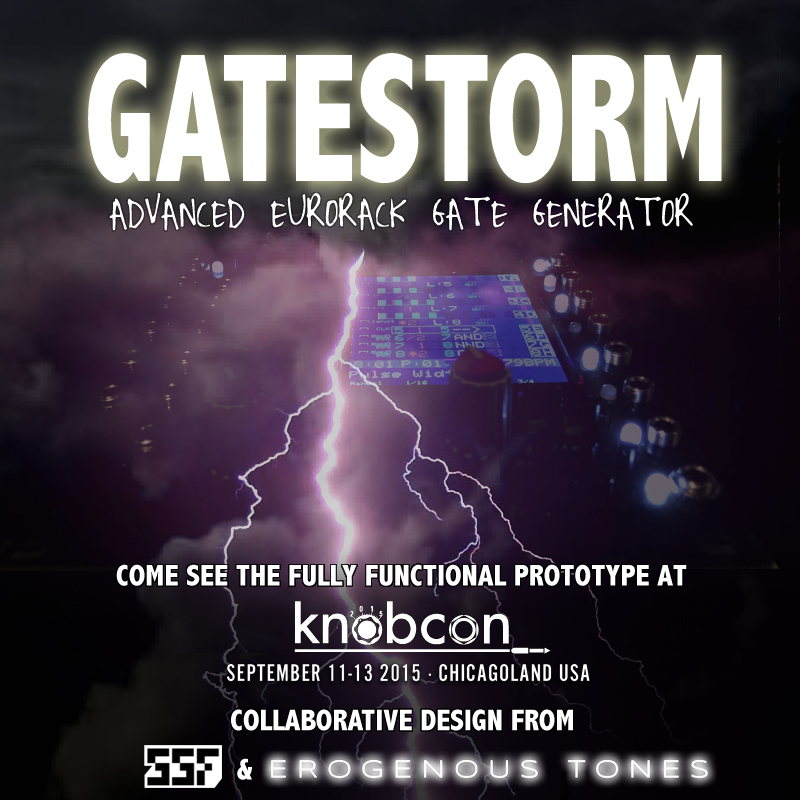
 GATESTORM
  MOTHER’S LITTLE HELPER